
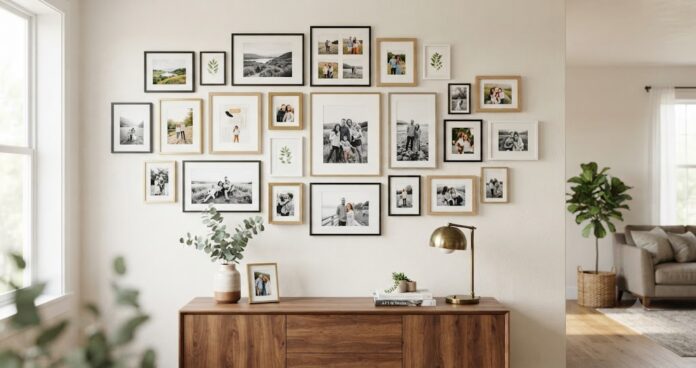
A creative photo wall turns blank, uninspiring walls into a deeply personal gallery that narrates your life’s story. By mixing frame styles, incorporating unconventional display methods, or playing with geometric layouts, you can create a high-impact focal point that reflects your unique taste and memories.
Key Takeaways
- Balance: Mix large statement pieces with smaller frames to create visual rhythm.
- Theme: Group photos by color palette, frame finish, or subject matter for a cohesive look.
- Method: Use non-traditional mounts like tension wires, clipboards, or digital frames to add dimension.
- Spacing: Consistent spacing (usually 2-3 inches) is the secret to a professional-looking gallery.
The Power of Cohesive Curating
The biggest mistake beginners make is treating a photo wall as a collection of random images. To achieve a high-end look, you need a thread that ties the pieces together.
The “Color Harmony” Approach
When you select photos, prioritize a consistent color temperature. Whether you opt for a classic black-and-white aesthetic or a warm, sepia-toned collection, unity is king.
Pro Tip: If your photos vary in color, use identical frames in a uniform finish (like matte black or brushed gold). This “frames-as-a-anchor” technique instantly makes mismatched photos look intentional.
The “Symmetrical Grid” Framework
For those who prefer a structured, sophisticated vibe, the grid layout is unbeatable. This works exceptionally well in hallways or above a console table.
| Layout Type | Best For | Visual Impact |
| Uniform Grid | Formal spaces, offices | Disciplined, architectural |
| Eclectic Salon | Living rooms, stairways | Playful, storytelling |
| Linear Row | Long corridors | Motion, continuity |
Going Beyond the Frame: Creative Displays
Why limit yourself to glass and wood? Modern interior design favors texture and movement.
The Tension Wire System
Using steel tension wires is a brilliant way to create an industrial, gallery-like feel. Use metal clips to hang photos; this allows you to rotate your pictures in seconds without pulling out a hammer and nail. It is perfect for capturing fleeting moments of your family or [External Link: Creative Photography Tips].
The “Living” Photo Wall
Incorporate greenery into your display. Interspersing small framed photos between wall-mounted planters or shelves with trailing vines adds organic warmth. This breaks up the hard lines of rectangular frames and brings life to the wall.
Implementing the “Floor-First” Strategy
Never drill holes until you have mapped your wall. The most common bottleneck is realizing a layout looks different on the wall than it did in your head.
Execution Steps:
- Clear the Space: Lay all frames on the floor in front of the wall.
- The Centerpiece: Start by placing your largest or most important photo in the center.
- Expansion: Work outward, balancing the weight of the frames as you go.
- Tracing: Trace each frame onto kraft paper, cut out the templates, and tape them to the wall. This lets you visualize the spacing perfectly before you drive a single screw.
[Internal Link: Essential Home Decorating Tips]
Lighting as a Narrative Tool
A photo wall disappears at night without proper illumination. If you are highlighting a specific gallery wall, dedicated lighting changes everything.
- Picture Lights: Battery-operated or hardwired LED picture lights create a high-end, museum-quality glow.
- Wall Washers: Adjustable spotlights installed on the ceiling can highlight the entire texture of your gallery.
Expert Insight: Avoid placing spotlights at sharp angles, as this creates distracting glare on glass-fronted frames. Aim for a soft, downward angle to bathe the wall in light.
Frequently Asked Questions (FAQ)
How much space should I leave between frames?
For a gallery wall, 2 to 3 inches is the sweet spot. It provides enough separation to distinguish individual photos while keeping the cluster looking unified.
Should I mix different frame colors?
You can, but it requires a “bridge” element. If you mix gold and black frames, ensure the photos themselves share a common color palette to keep the wall from looking chaotic.
How do I hang photos without damaging the walls?
Use high-quality adhesive strips (like Command strips). They are perfect for renters or those who like to change layouts frequently. Always clean the wall surface with rubbing alcohol first to ensure a strong bond.
Is it better to print photos in matte or glossy?
For framing, matte or luster finishes are superior. Glossy photos tend to stick to the glass in frames over time, which can ruin both the print and the glass surface.
How do I update a photo wall once it is finished?
Plan for a “pivot.” Use systems like tension wires or decorative shelves where you can swap frames without needing to patch holes or re-measure your entire layout.
Designing a creative photo wall is an exercise in both curation and construction. By focusing on cohesive themes, leveraging smart spacing, and introducing unique mounting techniques, you move beyond mere decoration. You are creating a living record of your home’s personality.
Ready to start? Select one wall in your home today, gather your favorite prints, and use the “floor-first” method to begin mapping out your gallery. Your walls are waiting—make them speak!