
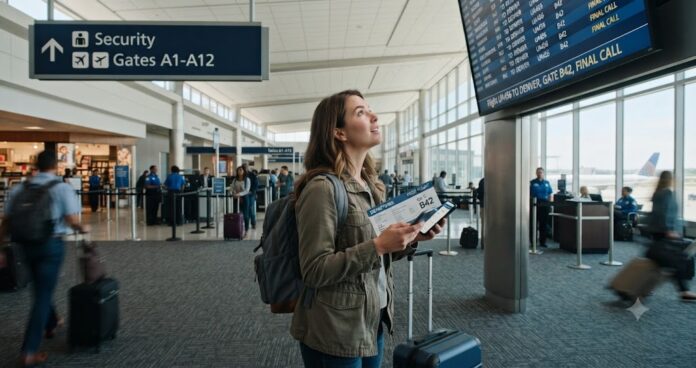
Navigating your first flight requires proactive preparation, clear knowledge of security protocols, and strategic timing. Arrive three hours before international departures (two hours for domestic), keep your boarding pass accessible, pack liquids in 3-1-1 compliant containers, and follow overhead signs to eliminate terminal anxiety completely.
The First-Time Flyer Checklist: Key Takeaways
If you are standing in the terminal right now and feeling overwhelmed, take a deep breath. Here is the fast track to success:
- Check In Online: Do this 24 hours before departure to download your digital boarding pass.
- The 3-1-1 Rule: Keep all liquids under 3.4 ounces (100ml) in a single, clear, quart-sized bag.
- Watch the Boards: Gate assignments change constantly; trust the airport monitors over your printed ticket.
- Dress Strategically: Wear slip-on shoes and avoid belts or excessive jewelry to breeze through security.
Pre-Flight Preparation: The Foundation of Stress-Free Travel
The secret to a seamless airport experience starts in your living room the night before. Most rookie mistakes happen during the packing phase, long before you ever step foot inside the terminal building.
Airports operate on strict bureaucratic rules. If your bags are too heavy, or if you bring prohibited items, you will face delays at the check-in desk or the security checkpoint.
Expert Insight: I always take a smartphone photo of my physical passport, visa pages, and driver’s license before leaving home. Store these in a secure, offline digital folder so you can access your critical identification data even if you lose cellular service or drop your physical wallet.
Start by auditing your luggage against airline size restrictions. Every airline enforces specific dimensions for carry-on bags and checked luggage.
Understanding Baggage Types and Limits
Do not guess your bag’s weight by lifting it. Use a digital luggage scale to verify your packed items meet the exact weight limits defined by your carrier. Exceeding these limits forces you to pay expensive overage fees right at the counter.
| Luggage Category | Typical Weight Limits | Best Used For |
| Personal Item (Purse, Laptop Bag) | Must fit under the seat in front of you | Passports, wallets, medications, chargers, headphones |
| Carry-On Bag (Small Roller, Backpack) | 22 to 35 lbs (Airline dependent) | One change of clothes, valuables, electronics, toiletries |
| Checked Baggage (Large Suitcase) | 40 to 50 lbs (Standard economy limit) | Bulk clothing, large shoes, liquids over 3.4 ounces |
When preparing your items, you must adhere strictly to global aviation safety rules regarding dangerous goods. For instance, spare lithium-ion batteries and power banks must always stay in your carry-on luggage. If placed in checked baggage, they present a fire hazard and airport security will confiscate them.
Make sure to cross-reference your items with an updated [Internal Link: ultimate pre-flight packing checklist] to avoid leaving essentials behind.
The 3-1-1 Liquids Formula Explained
TSA and international security agencies enforce the 3-1-1 rule for liquids, gels, and aerosols in your carry-on.
- 3: Each liquid container must be 3.4 ounces (100ml) or smaller.
- 1: All containers must fit comfortably inside one clear, quart-sized plastic bag.
- 1: Only one plastic bag is permitted per traveler.
If you carry a large bottle of expensive shampoo that is only half-full, security personnel will throw it away. The rule applies strictly to the size of the container itself, not the volume of liquid remaining inside.
Navigating the Departure Terminal: Check-In and Baggage Drop
When you arrive at the airport, look at the large signs outside the building. Terminals are usually split by airline or by domestic and international flights. Make sure your rideshare driver drops you off at the correct departure level for your specific airline.
Once inside, your immediate goal is to acquire your boarding pass and hand over your large suitcases.
Pro Tip: Skip the massive main check-in lines by using the airline’s self-service kiosks. You simply scan your passport or type in your confirmation code, print your own luggage tags, and walk directly to the designated “Bag Drop” line.
If you checked in online via your airline’s mobile app, you already possess a digital barcode boarding pass. If you only have a carry-on bag, you can bypass the check-in desks completely and walk straight toward the security checkpoints.
Deciphering Your Boarding Pass
Your boarding pass is your passport through the airport ecosystem. It displays your flight number, departure gate, seat assignment, and boarding group.
Pay close attention to the “Boarding Time,” which is typically 30 to 45 minutes before the actual “Departure Time.” Airlines close the aircraft doors early, and they will not wait for late passengers.
Conquering the Security Checkpoint Without Panic
The security screening area is where most first-time flyers experience the highest levels of anxiety. Understanding exactly what is expected of you speeds up the entire process for everyone in line.
As you approach the front of the queue, an officer will verify your identity. Have your physical government-issued photo ID or passport ready, along with your boarding pass.
Pro Tip: While standing in line, begin emptying your pockets. Place your phone, loose coins, keys, and wallet directly into your carry-on bag or jacket pockets so you aren’t scrambling when you reach the plastic bins.
Once cleared past the document checker, you will step up to the conveyor belt to prepare your items for X-ray scanning.
The Security Bin Blueprint
Different airports utilize different scanning technologies, but the fundamental blueprint remains similar worldwide. You must separate specific items into the provided plastic bins.
| Put These Items Separately in the Bins | Leave These Items Inside Your Bag |
| Large electronics (Laptops, tablets, Kindles) | Dry clothing and jackets without metal zippers |
| The clear 3-1-1 quart bag of liquids | Standard documents, books, and passports |
| Bulky outerwear, heavy coats, and winter hats | Small electronic accessories (cables, wired headphones) |
| Shoes (unless you qualify for TSA PreCheck) | House keys and plastic items |
Walk smoothly through the metal detector or body scanner when the officer signals you. Avoid wearing pants that require a heavy metal belt, as removing it adds another step to your routine. For more information on what counts as a prohibited item, check the official guidelines on the [External Link: TSA Prohibited Items List].
Once you pass through the scanner, collect your bins from the conveyor belt. Move your items immediately to the designated packing benches located past the screening area to avoid blocking the line for others.
Locating Your Gate and Managing Your Time
After exiting the security area, you will enter the secure airside departure lounge. Do not get distracted by the duty-free shops, restaurants, or coffee stands just yet. Your absolute priority is finding your physical departure gate.
Look for the large flight information display system (FIDS) monitors hanging from the ceilings. Find your flight number listed chronologically by departure time.
Verify the gate number listed on the screen. Terminal gates can change unexpectedly due to incoming flight delays or operational adjustments.
Expert Insight: In practice, the gate listed on the boarding pass you printed at home is often outdated by the time you clear security. Trust the physical airport monitors and your airline’s live mobile app notifications above everything else.
Follow the overhead directional arrows to locate your gate wing. Once you find the gate and confirm your flight number is displayed on the screen above the podium, you can safely relax.
How to Spend Your Wait Time Smartly
Now that you know exactly where your plane is, you can utilize your remaining wait time effectively:
- Charge Your Electronics: Outlets fill up fast near the gate. Find a charging station and top off your devices.
- Hydrate Effectively: Airplanes feature extremely dry cabin air. Bring an empty water bottle through security and fill it up at an airport water station to save money.
- Stay Close: Listen closely to the overhead public address announcements. Agents frequently call out zone updates or seat changes.
The Boarding Process and Stepping Onto the Plane
When it is time to board, the gate agents will not open the doors for everyone at once. They manage the flow of people using structured boarding groups or zones, which are clearly stamped on your boarding pass.
First-class passengers, elite frequent flyers, and individuals requiring special assistance board first. Economy passengers follow in groups, usually starting from the back of the aircraft to the front.
Pro Tip: Do not crowd the boarding lane before your specific zone is called. Standing in front of the gate entrance blocks other passengers and slows down the departure process for the entire aircraft.
Have your boarding pass open on your smartphone or hold the paper ticket out in your hand. The gate agent will scan your barcode, and you will walk down the jet bridge toward the airplane door.
A flight attendant will greet you at the entrance of the aircraft and point you down the correct aisle toward your assigned seat row.
Frequently Asked Questions (FAQ)
What happens if I miss my flight?
If you miss your departure, proceed immediately to your airline’s customer service desk inside the terminal or call their customer support line. If your delay was caused by a connecting flight disruption, the airline will rebook you on the next available flight for free. If you missed it due to being late to the airport, you may have to pay a change fee or purchase a standby ticket.
Can I bring food through airport security?
Yes, you can bring solid food items like sandwiches, fruit, nuts, and protein bars through security screening. However, liquid or gel-like foods (such as yogurt, peanut butter, jams, or soups) must strictly adhere to the 3-1-1 liquid rule and cannot exceed 3.4 ounces.
How early do I really need to arrive at the airport?
For domestic flights, arrive at least two hours prior to your scheduled departure time. For international journeys, arrive three hours early. This provides an adequate buffer for heavy traffic, long check-in queues, baggage processing delays, and peak security wait times.
Do I need to take off my jewelry before walking through security?
Small, delicate jewelry like rings, small earrings, and wedding bands usually do not trigger the metal detectors. However, large statement necklaces, heavy metal watches, and chunky bracelets will set off the alarms. It is best to pack large metallic accessories inside your carry-on bag until you finish the screening process.
What should I do if my checked luggage is lost?
Before leaving the baggage claim area, find your airline’s specific baggage service office located near the carousels. File an official Property Irregularity Report (PIR) immediately. Provide them with your physical baggage claim tag receipt, a detailed description of your suitcase, and the local address of your hotel or residence so they can deliver it to you.
Ready to Take Flight?
Navigating an airport for the first time is simply a matter of following instructions, remaining organized, and giving yourself plenty of time. Every veteran traveler started exactly where you are today. By preparing your bags correctly and understanding the security rules, you eliminate the stress and unlock the excitement of travel.
Before you head out the door, check out our comprehensive guide on [Internal Link: how to handle long layovers smoothly] to maximize your comfort during your journey. Safe travels, and enjoy your time in the sky!